Amazon Kendra
Create Index
-
Navigate to
Services → Amazon Kendra → Indexes → Create index -
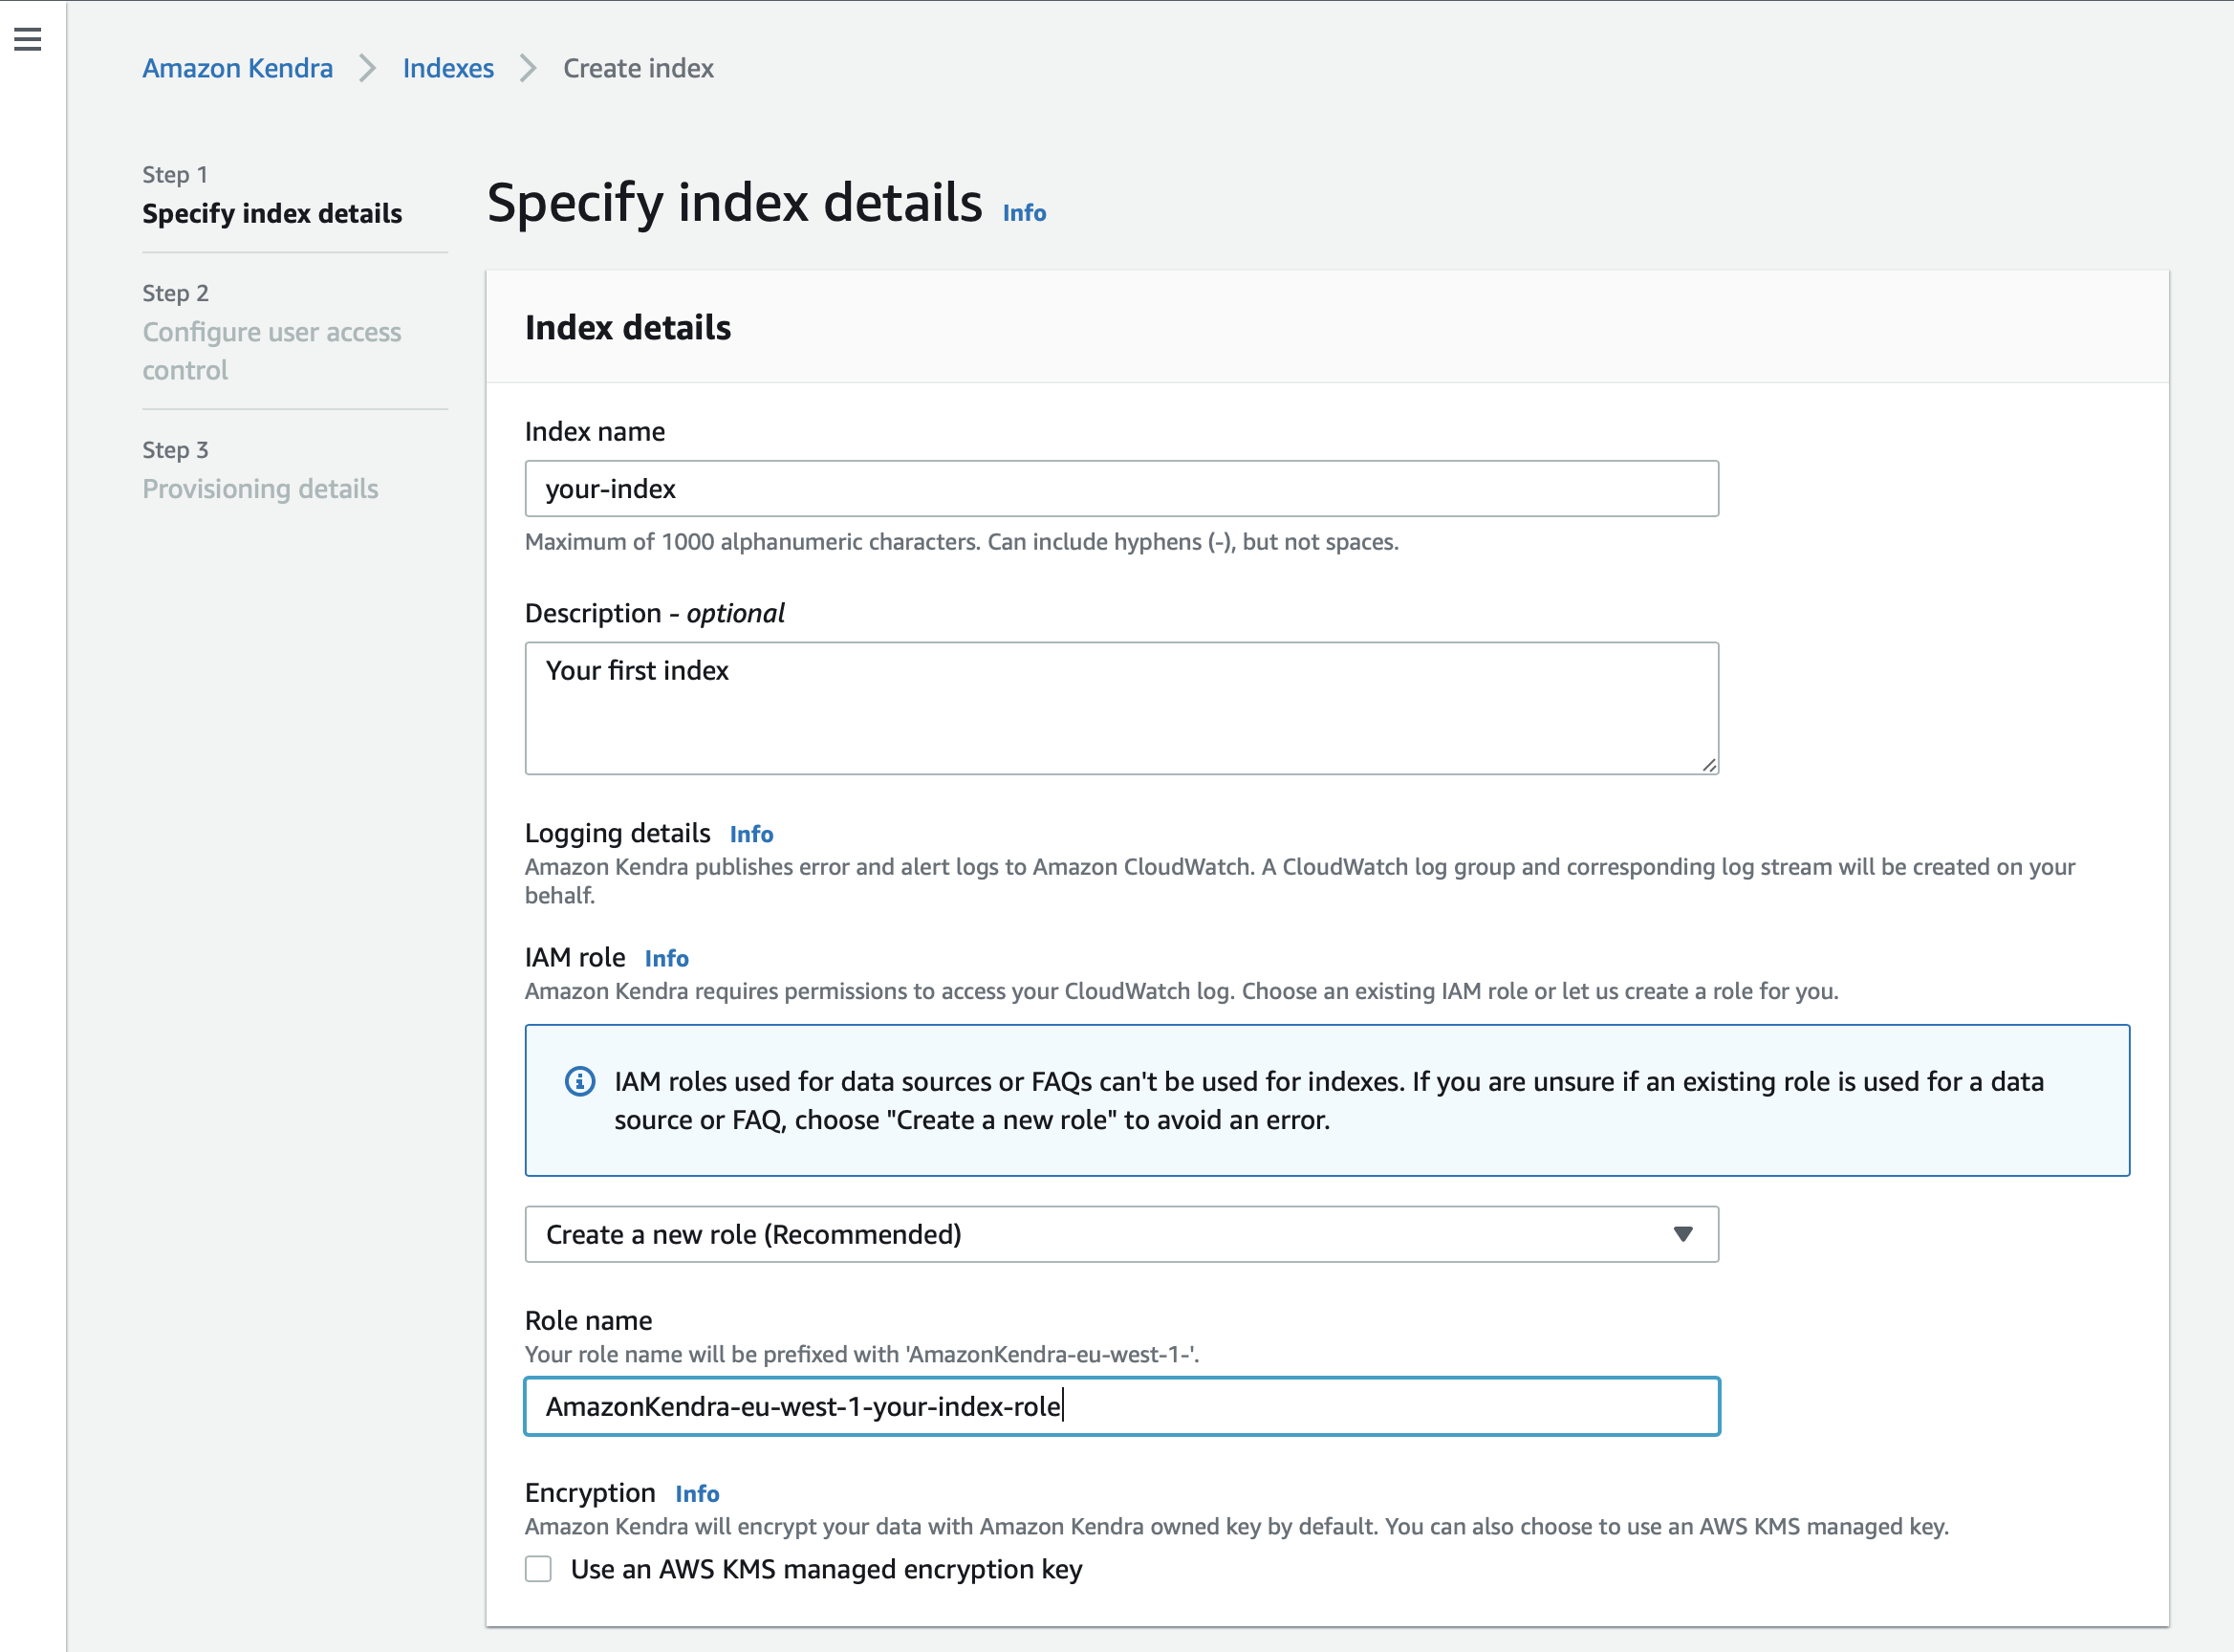
Provide an index name and (optionally) a description
-
Specify your IAM role
When creating a new index, it is recommended to create a new role for each index.
You can use the option to let the role be automatically created during index creation to make sure that all permissions are assigned to the new role.
If you prefer to specify an existing IAM role, make sure your role has the permission to access the CloudWatch assigned:
{
    "Version": "2012-10-17",
    "Statement": [
        {
            "Effect": "Allow",
            "Action": "cloudwatch:PutMetricData",
            "Resource": "*",
            "Condition": {
                "StringEquals": {
                    "cloudwatch:namespace": "Kendra"
                }
            }
        },
        {
            "Effect": "Allow",
            "Action": "logs:DescribeLogGroups",
            "Resource": "*"
        },
        {
            "Effect": "Allow",
            "Action": "logs:CreateLogGroup",
            "Resource": "arn:aws:logs:region:account ID:log-group:/aws/kendra/*"
        },
        {
            "Effect": "Allow",
            "Action": [
                "logs:DescribeLogStreams",
                "logs:CreateLogStream",
                "logs:PutLogEvents"
            ],
            "Resource": "arn:aws:logs:region:account ID:log-group:/aws/kendra/*:log-stream:*"
        }
    ]
}| Use the recommended option "Create a new role" to avoid an error and conflicts. |
-
Access Control Settings → Select
Nofor the optionUse tokens for access control?

| Raytion Enterprise Connectors are synchronizing third-party content information together with its access control and principal information. The user and group memberships are fully synchronized by the connector with Kendra.In order to deploy Kendra with Secure Search, apply the user attribute filter for the current user and the search result will be automatically restricted to the documents ACL. |
-
Choose the edition according to your use case.

Create Data Source
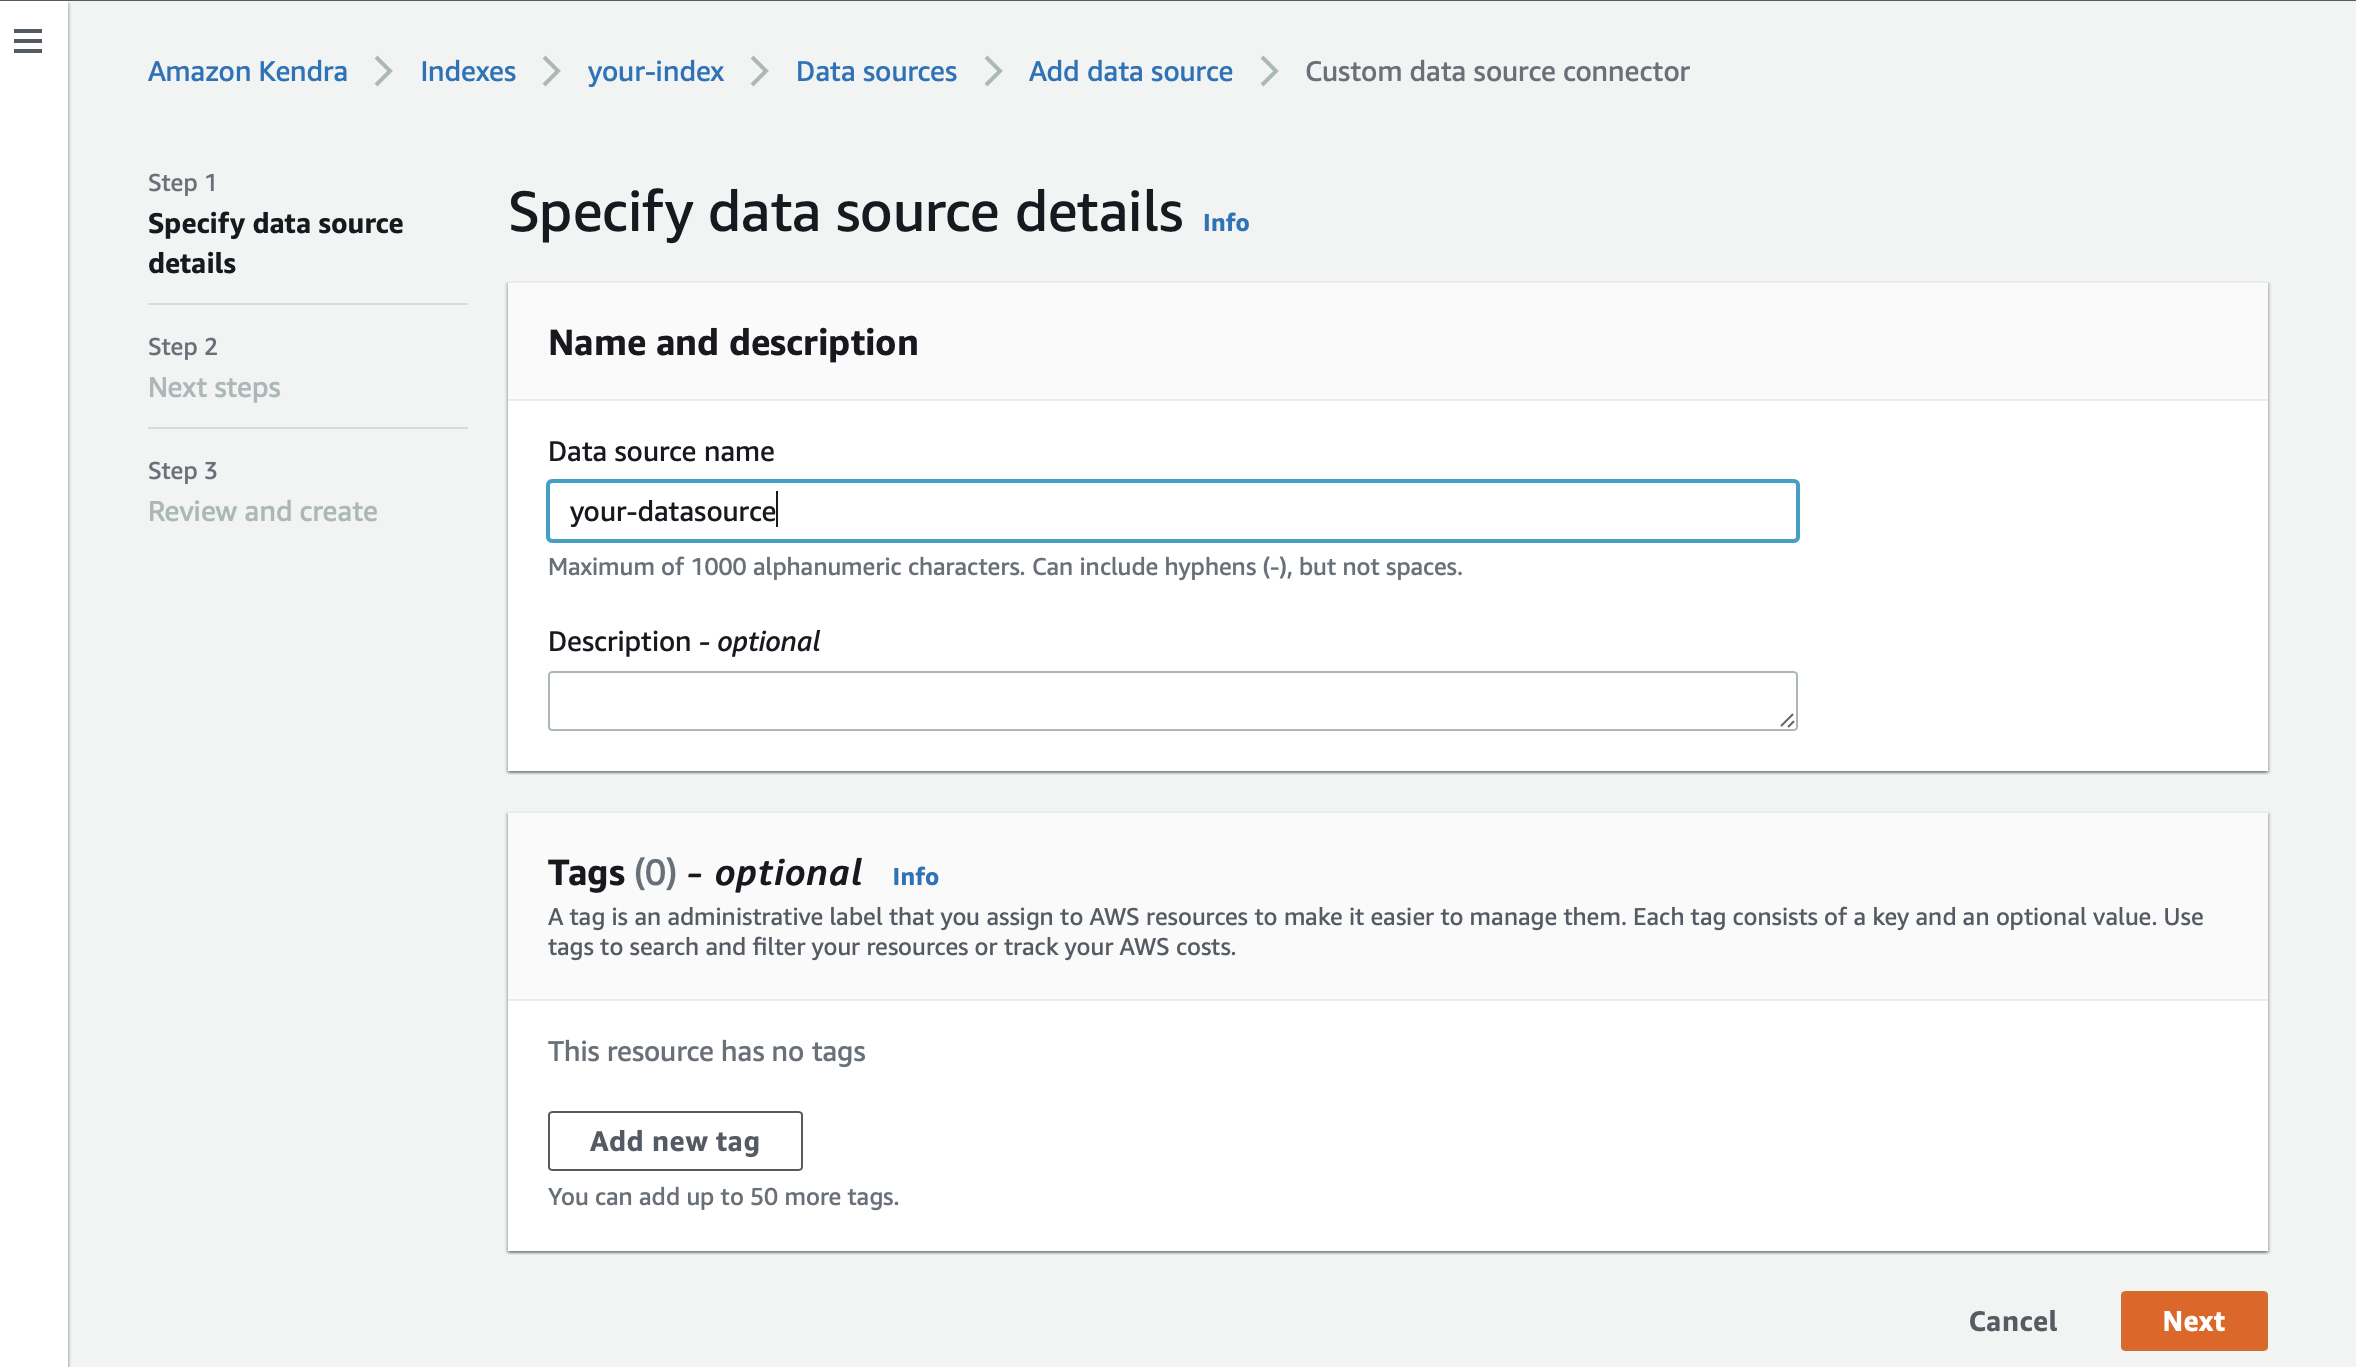
Once the index is created, add a custom data source connector to your index. The ID of the registered Data Source will be configured in the connector.All documents and groups synchrnonized by the connector will be linked to the specified data source.
-
Navigate to
Services → Amazon Kendra → Indexes → <your_index> → Data management → Data sources → Add data source -
Provide a data source name and (optionally) a description
Amazon S3 Integration
Create S3 Bucket
Inside your AWS Console, navigate to Services → Amazon S3 and create a new bucket.
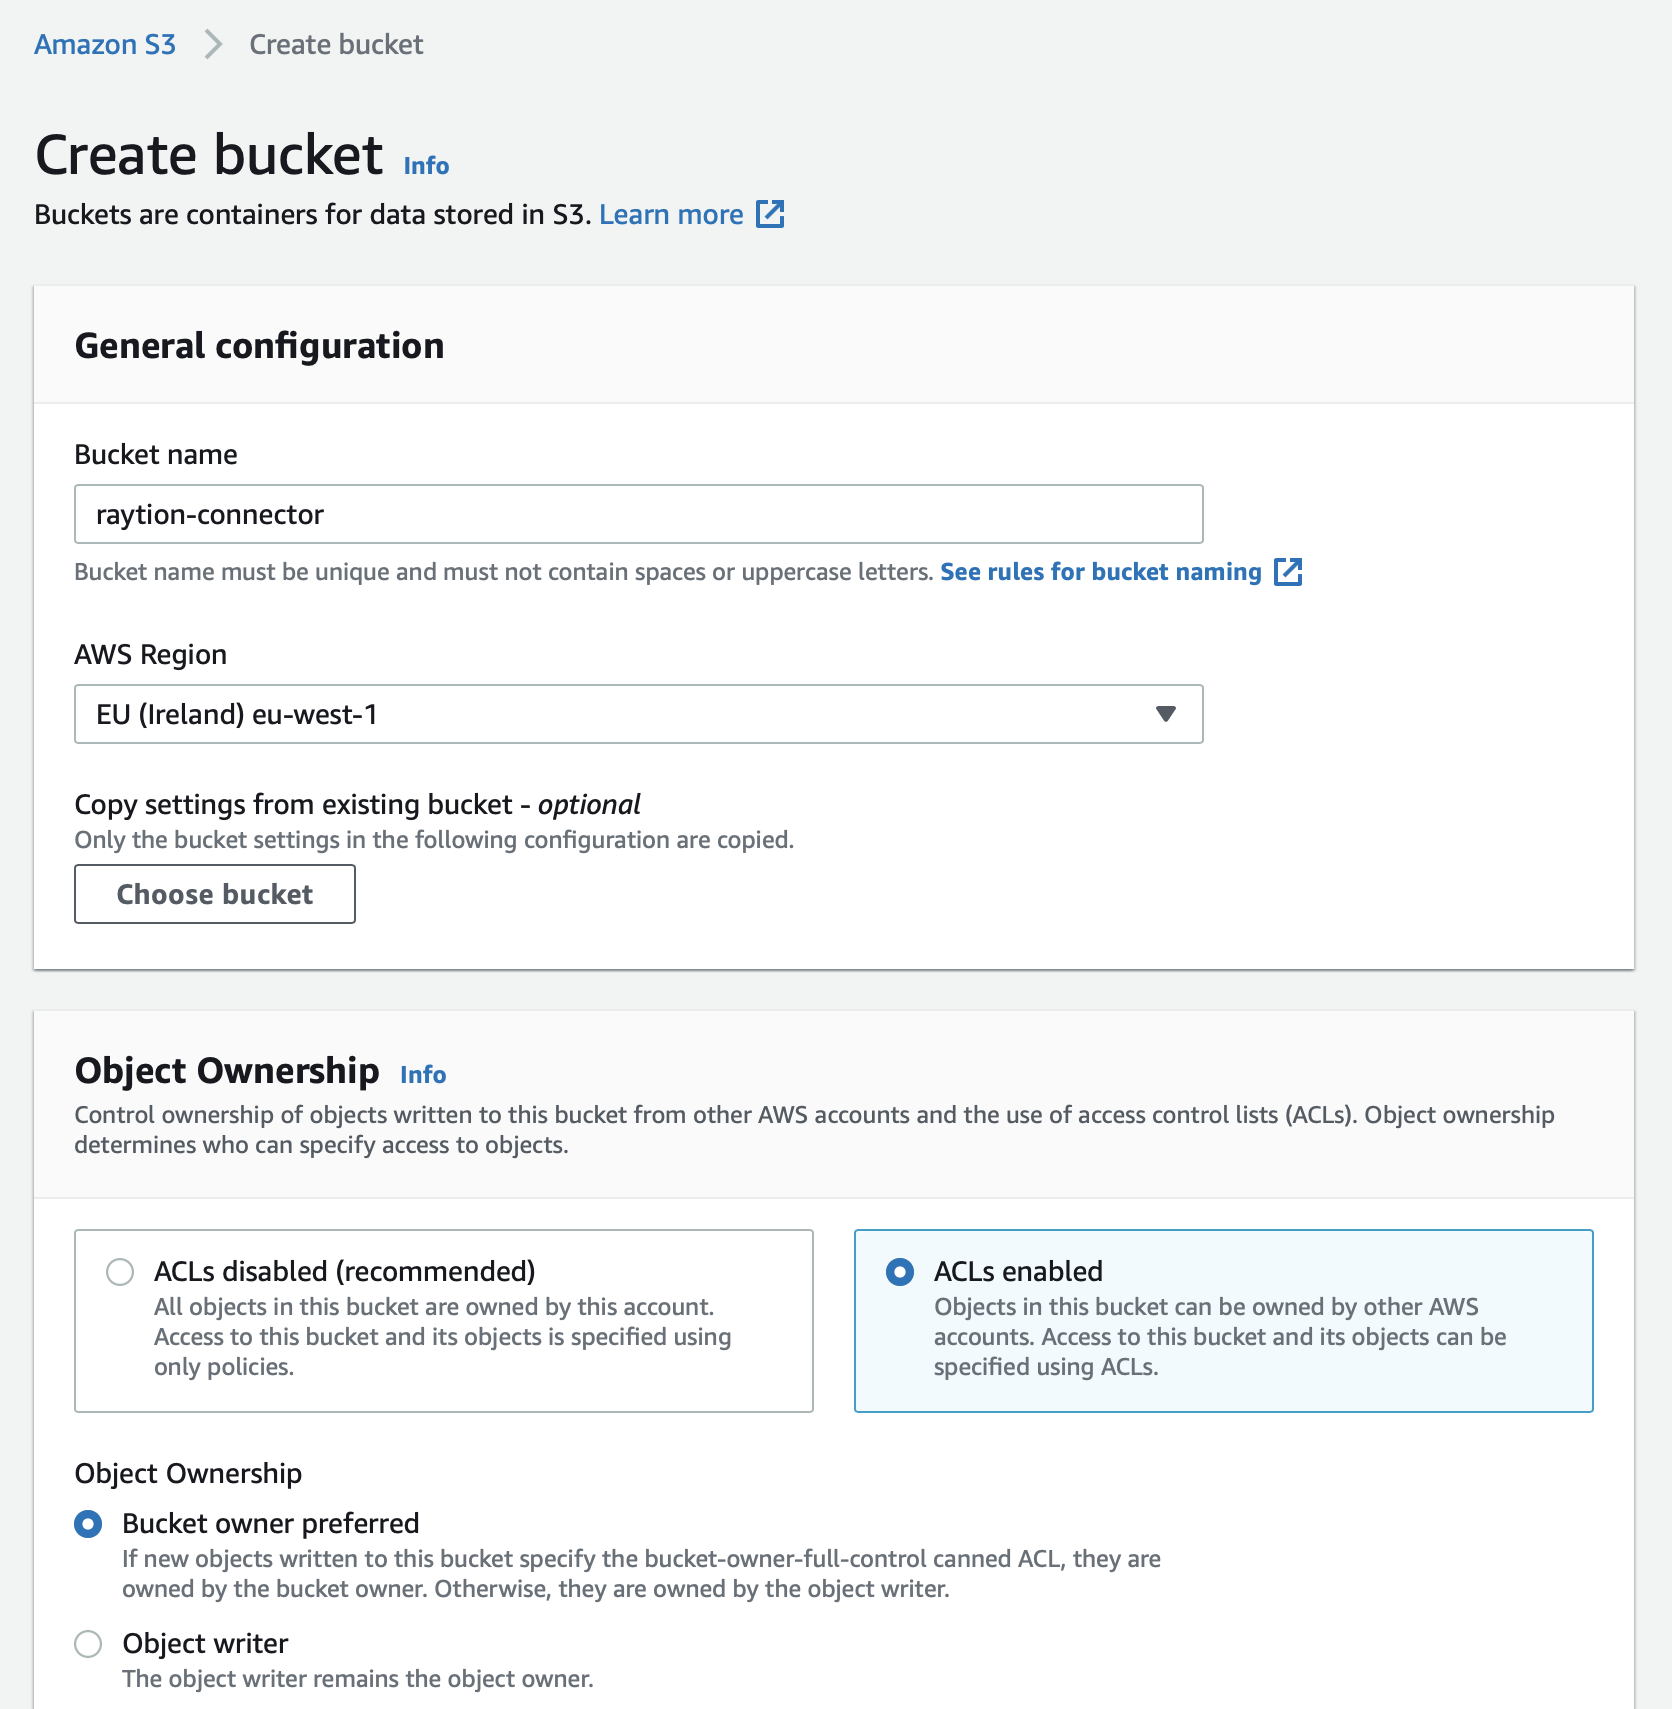
Make sure to enable the ACL when creating the bucket to assign write access to the bucket for an account configured in the connector.
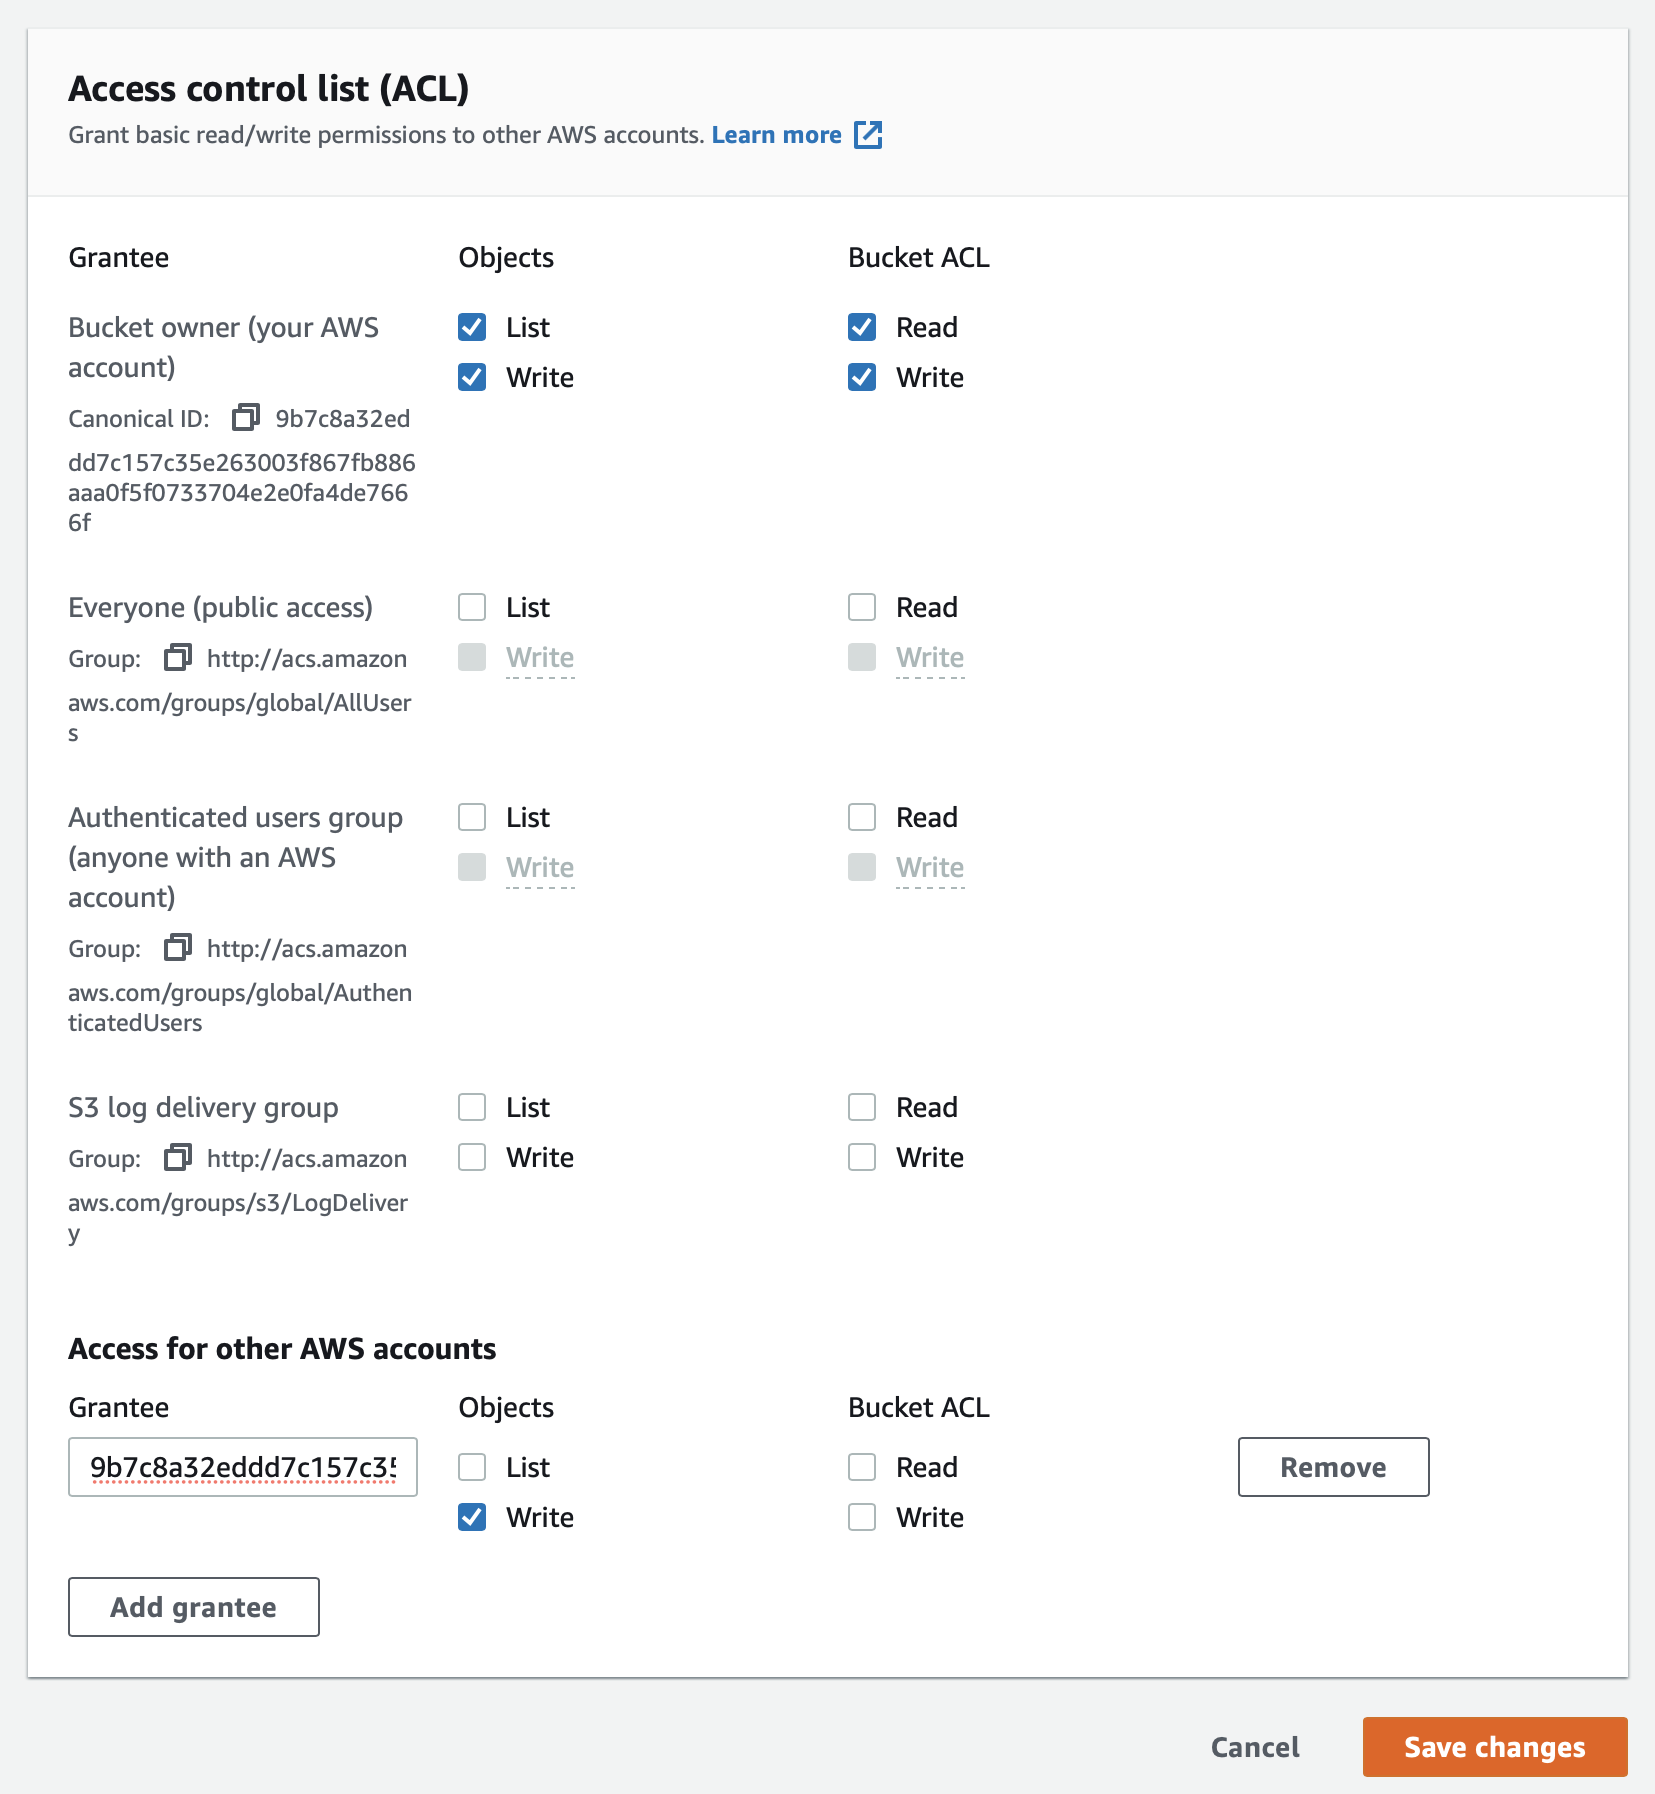
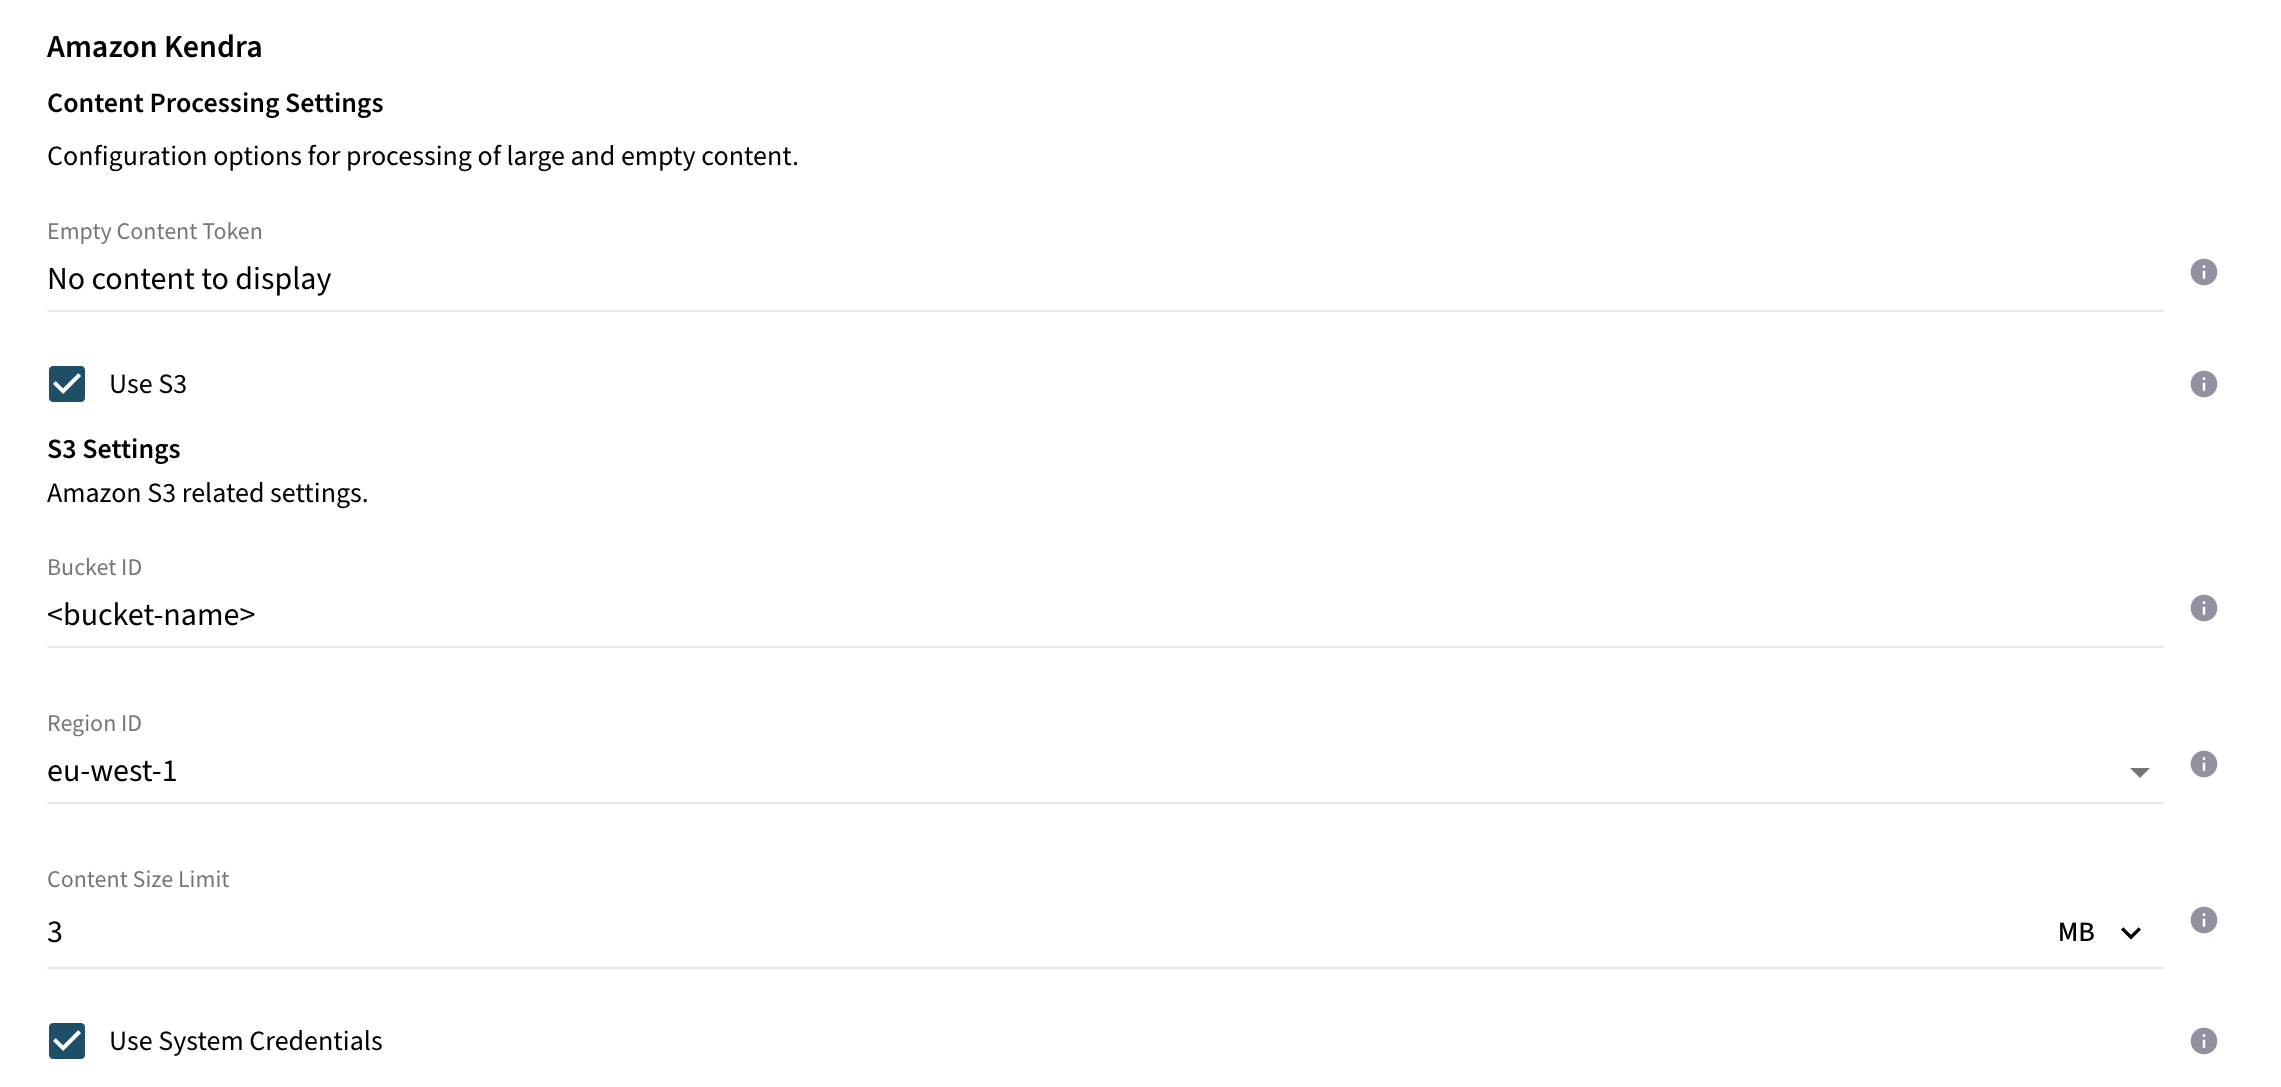
The added account with write access to the bucket needs to be specified under Advanced Configuration → Content Processing Settings in the connector configuration. To retrieve the Canonical ID of the respective account, follow the instructions at Find the canonical user ID of your AWS account.
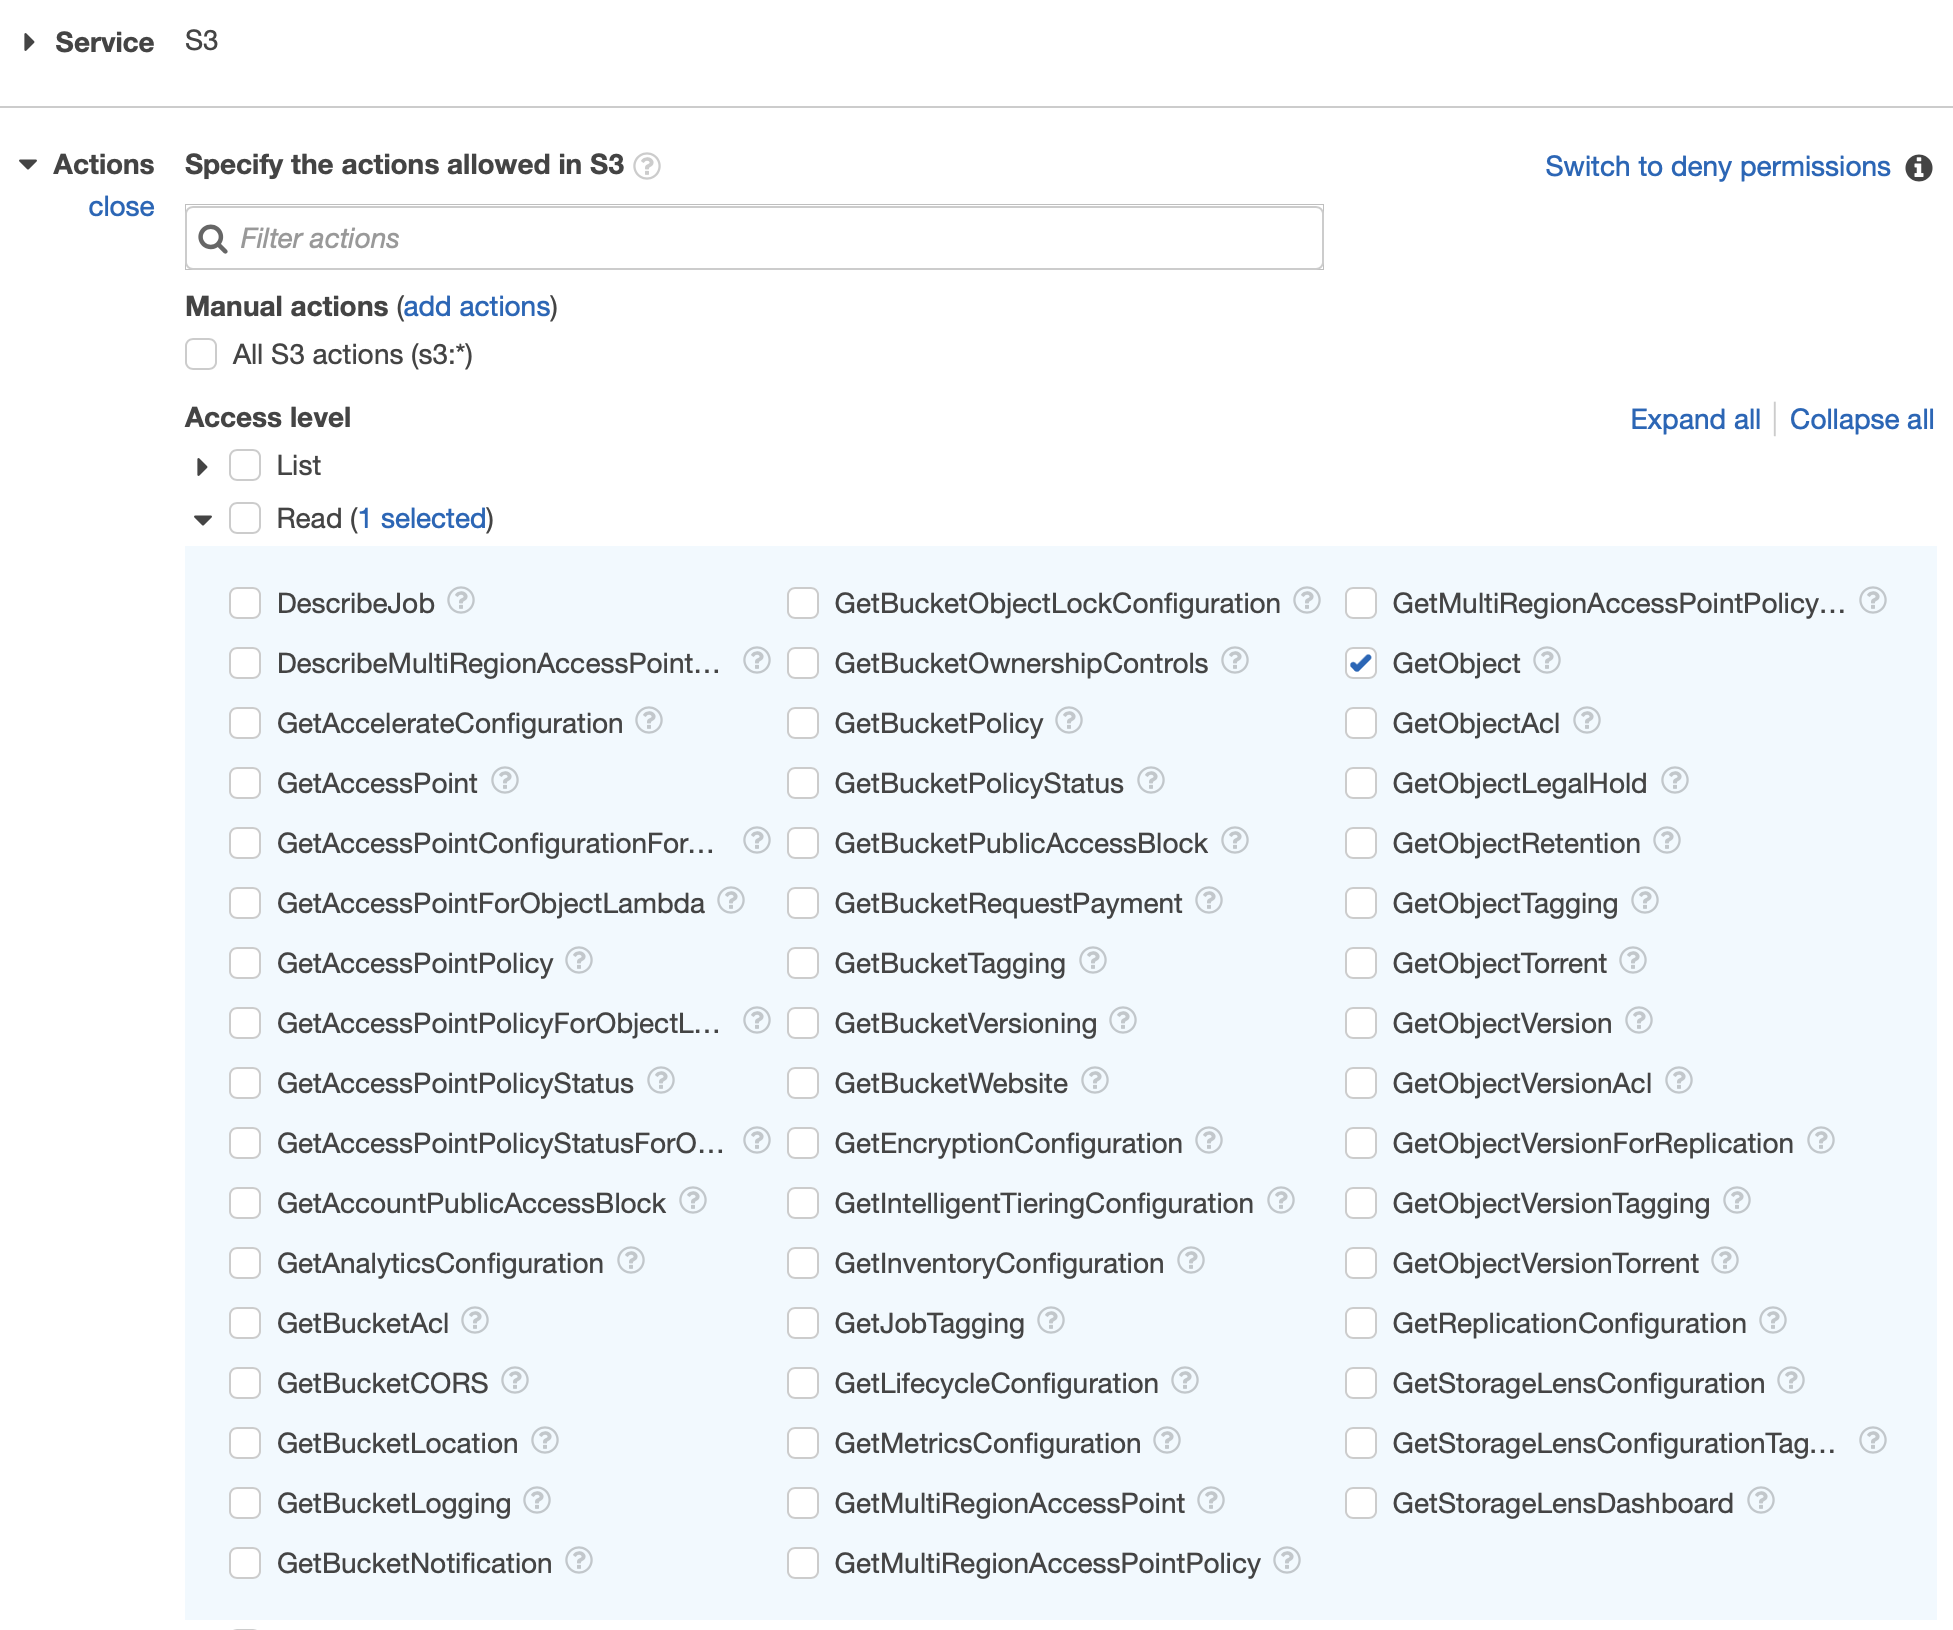
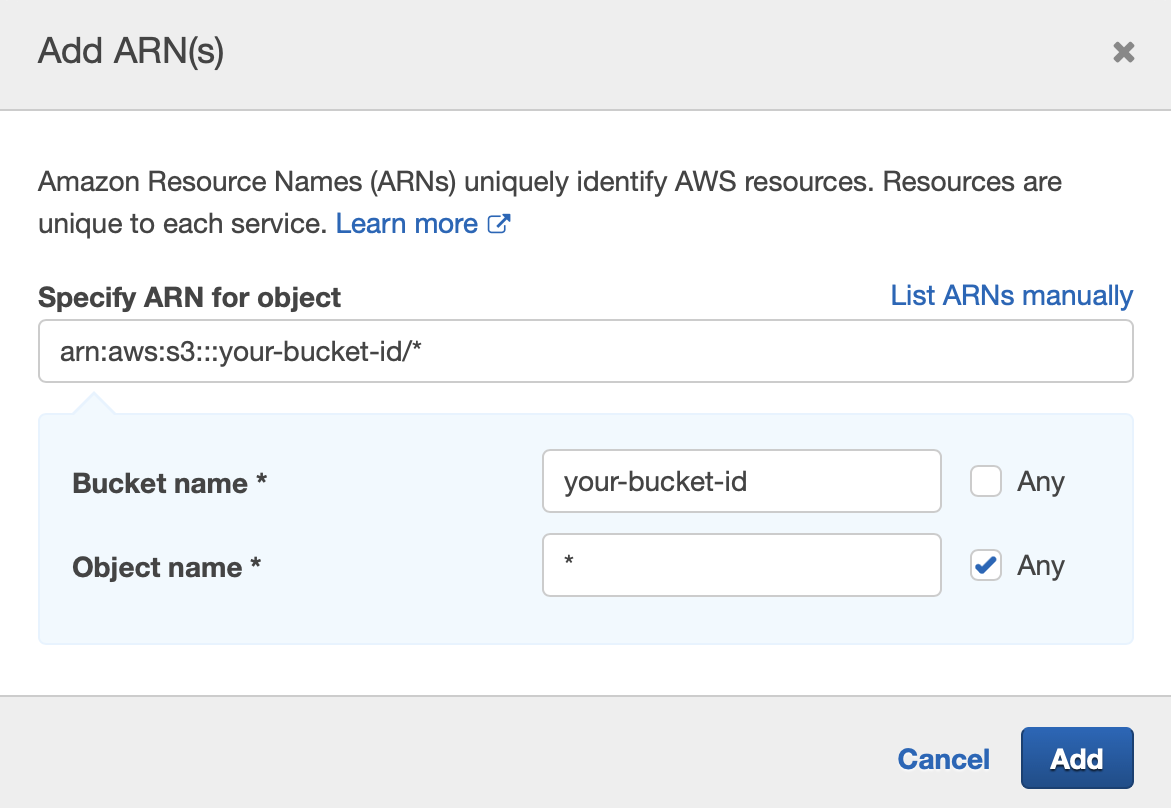
Add S3 Permission to IAM Policy
The IAM role attached to your Kendra Index and configured in your connector under Basic Configuration → Amazon Kendra → Amazon Kendra Instance Settings → Amazon Resource Name (ARN) requires an additional role policy if the option Use S3 is enabled in the connector.
Following role policy needs to be added to the policies:
{
    "Version": "2012-10-17",
    "Statement": [
        {
            "Effect": "Allow",
            "Action": [
                "s3:GetObject"
            ],
            "Resource": [
                "arn:aws:s3:::bucket name/*"
            ]
        }
    ]
}
In order to add the policy, navigate Identity and Access Management (IAM) → Access management → Roles and select the role attached to your index.
Click on Edit Policy and add the permission S3:GetObject to the selected policy.
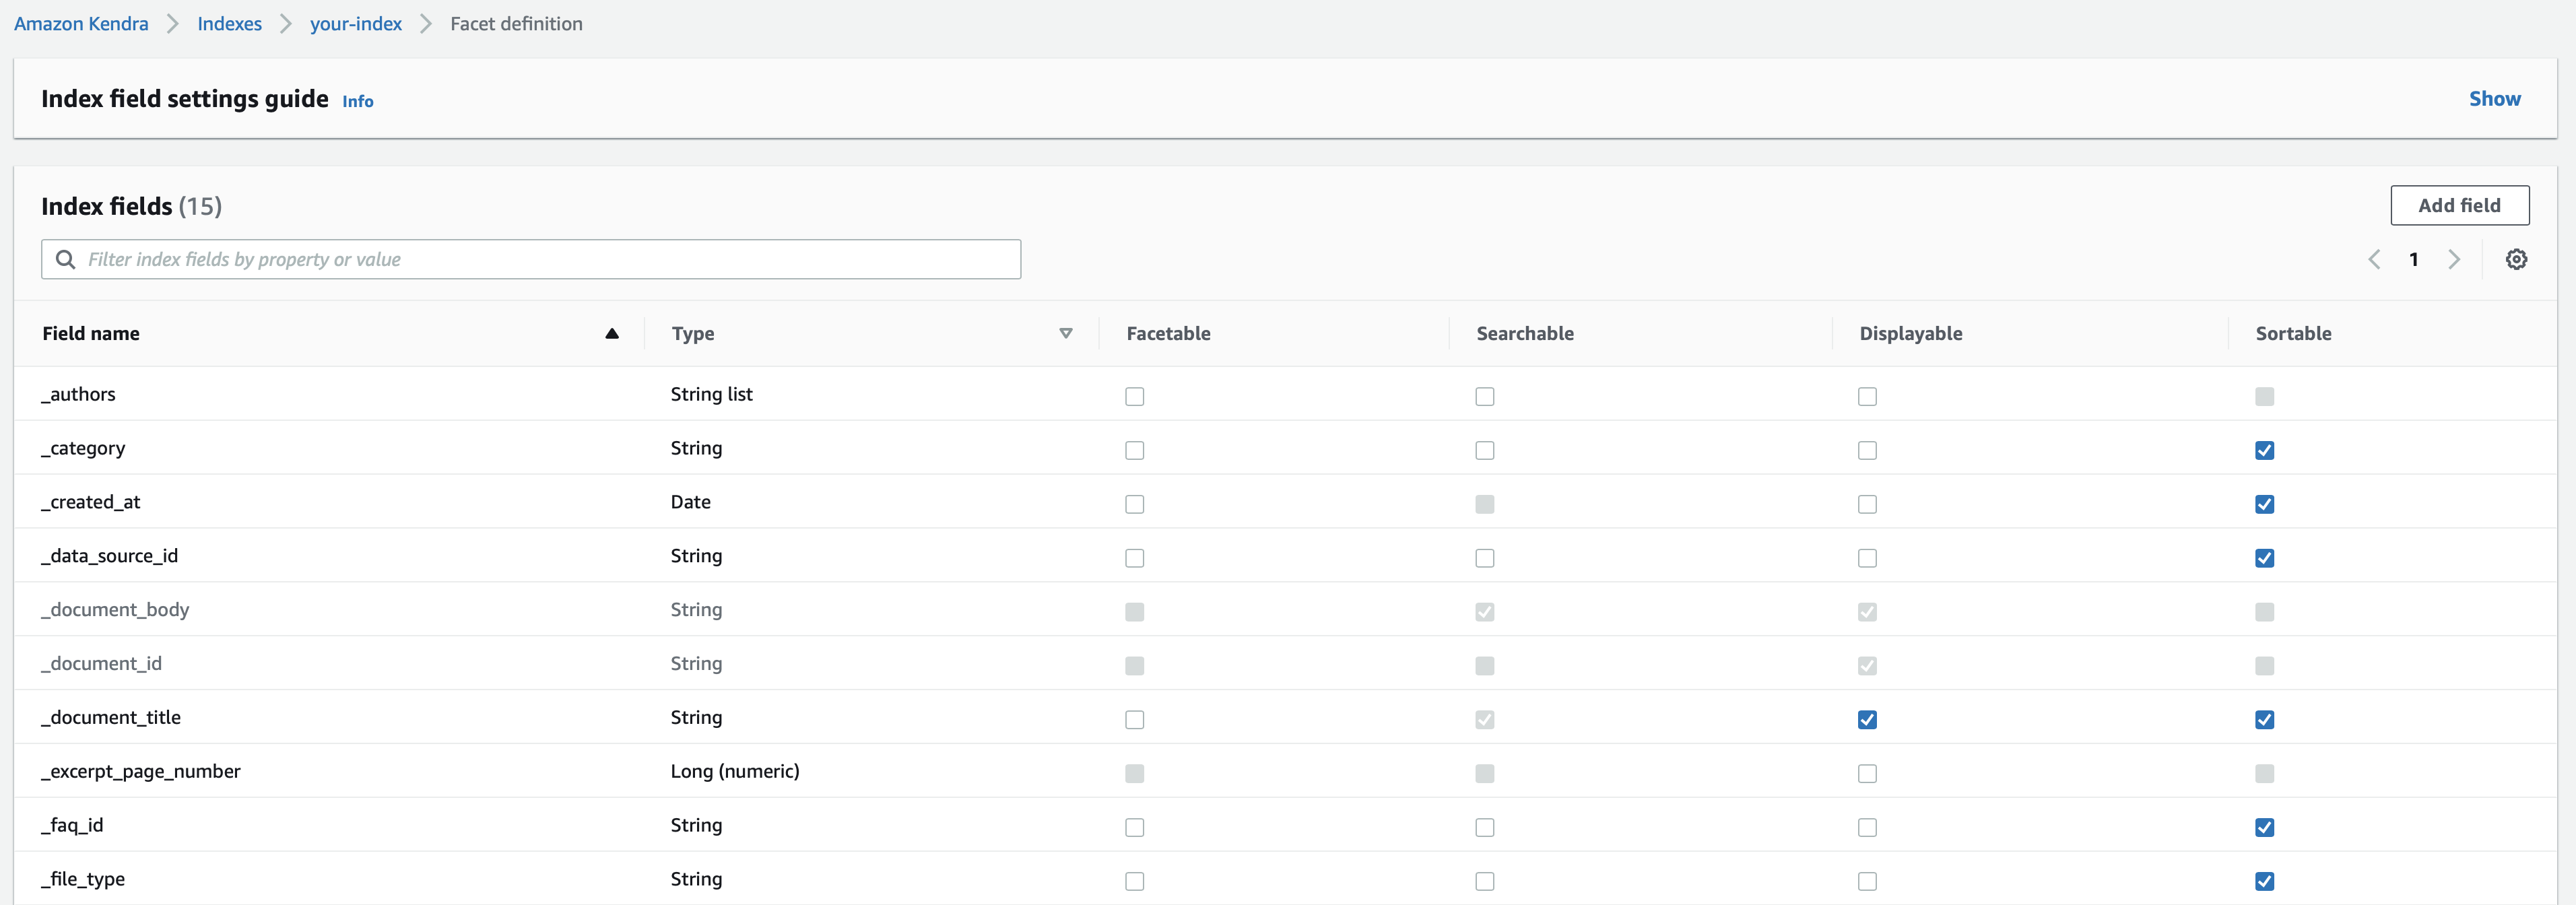
Facet Definition
Out of the box, our connector is processing the documents according to the default facet definition. You can extend the facet definition to include source system specific metadata. Once added into the facet definition, the connector will automatically process all documents according to the extended facet definition.
-
Navigate to
Services → Amazon Kendra → Indexes → <your_index> → Data management → Facet definition -
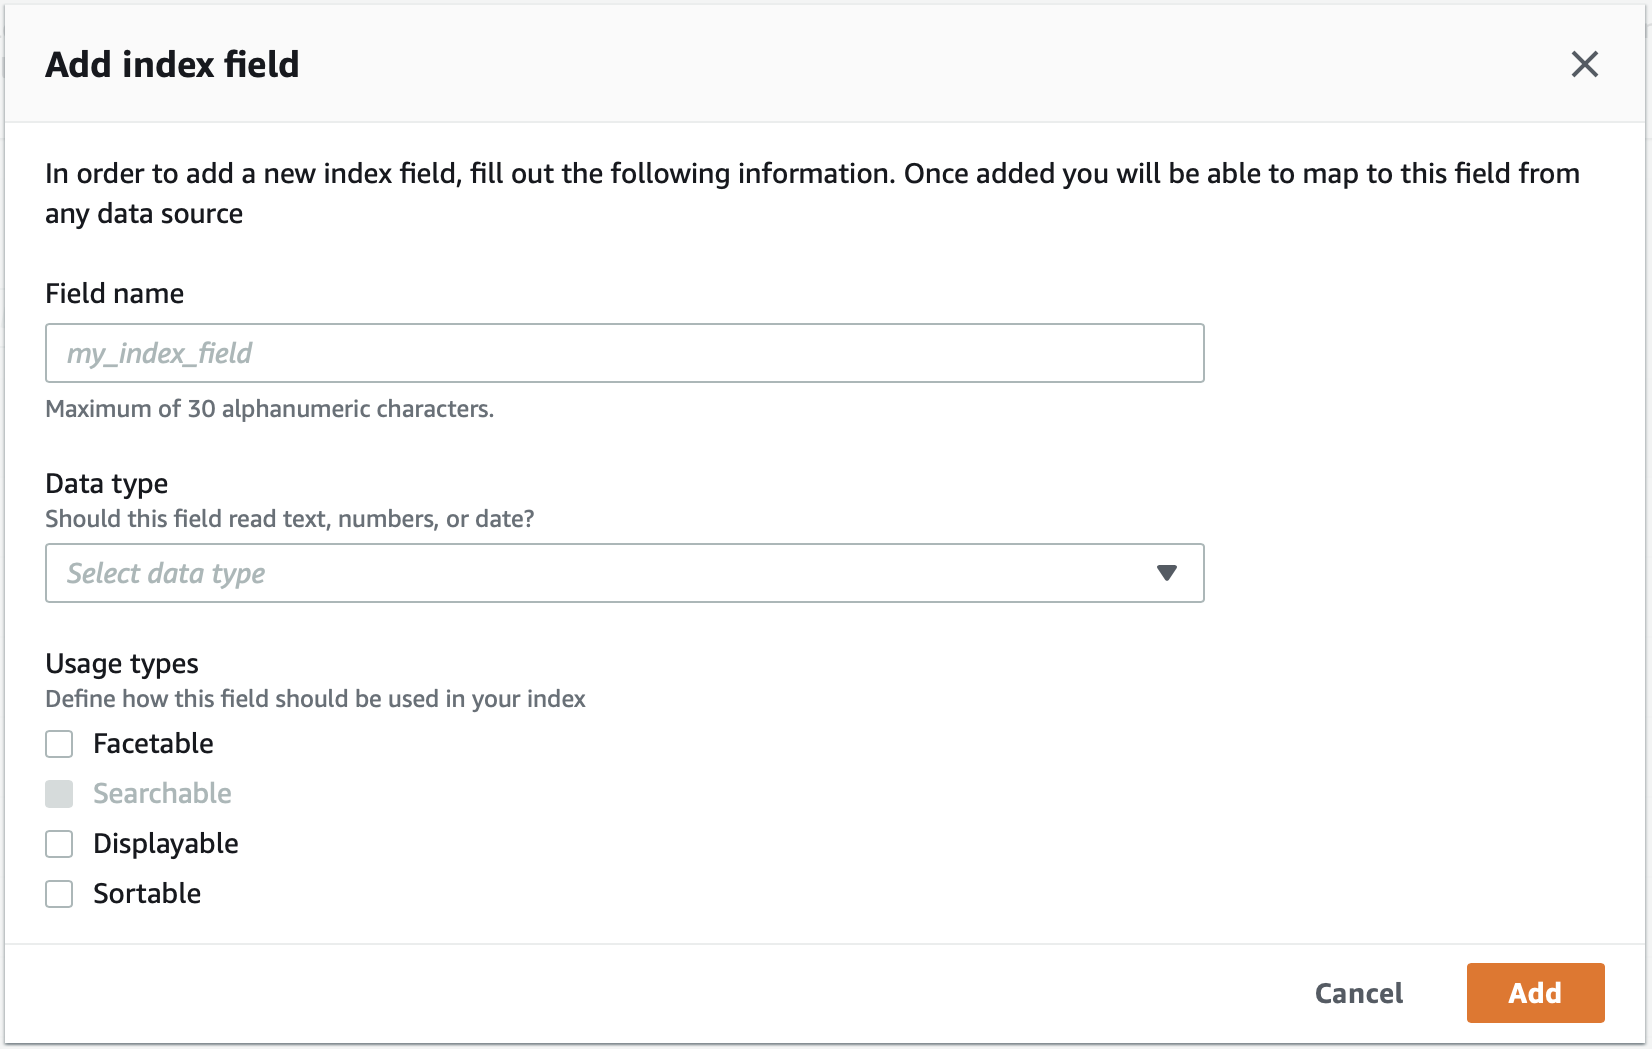
Click on
Add field
-
Provide the field name, data type and select the usage type
EC2 Instance Profile
If the connector in installed on an AWS EC2 instance, the credentials required by the connector in order to authenticate and authorize towards the Kendra Service can be retrieved from the IAM role passed to your EC2 instance where the connector is deployed.
The connector fetches the security credentials from the instance metadata item iam/security-credentials/<name-of-the-role-attached-to-ec2-instance> which grants automatically the same permissions for the actions and resources defined in the attached role.
This allows the connector to interact with the Kendra service in more secure way, as the credentials retrieved from the metadata service are temporary and rotated automatically instead of saving static and permanent account credentials in the connector.
Create IAM Role and define Policies
To create a role for your EC2 instance, navigate to Identity and Access Management (IAM) → Roles → Create role.
Assign following additional policy permissions to the role:
| Service | Action | Resource | Description |
|---|---|---|---|
Amazon Kendra |
|
|
Allows the connector to retrieve and verify the configured index information. |
Amazon Kendra |
|
|
Allows the connector to retrieve and verify the configured data source information. |
Amazon Kendra |
|
|
Allows the connector to index documents. |
Amazon Kendra |
|
|
Allows the connector to delete documents from the index. |
Amazon Kendra |
|
|
Allows the connector to retrieve the processing state of indexed or deleted documents. Required if the option |
Amazon S3 |
|
|
Allows the connector to retrieve and verify the configured bucket name. Required if the option |
Amazon S3 |
|
|
Allows the connector to put objects to the S3 bucket. Required if the option |
Amazon S3 |
|
|
Allows the connector to delete objects from the S3 bucket. Required if the option |
Identity and Access Management |
|
|
Allows the connector to pass the service-linked IAM role attached to the index which allows the Kendra service to access other AWS service e.g. S3, CloudWatch. |
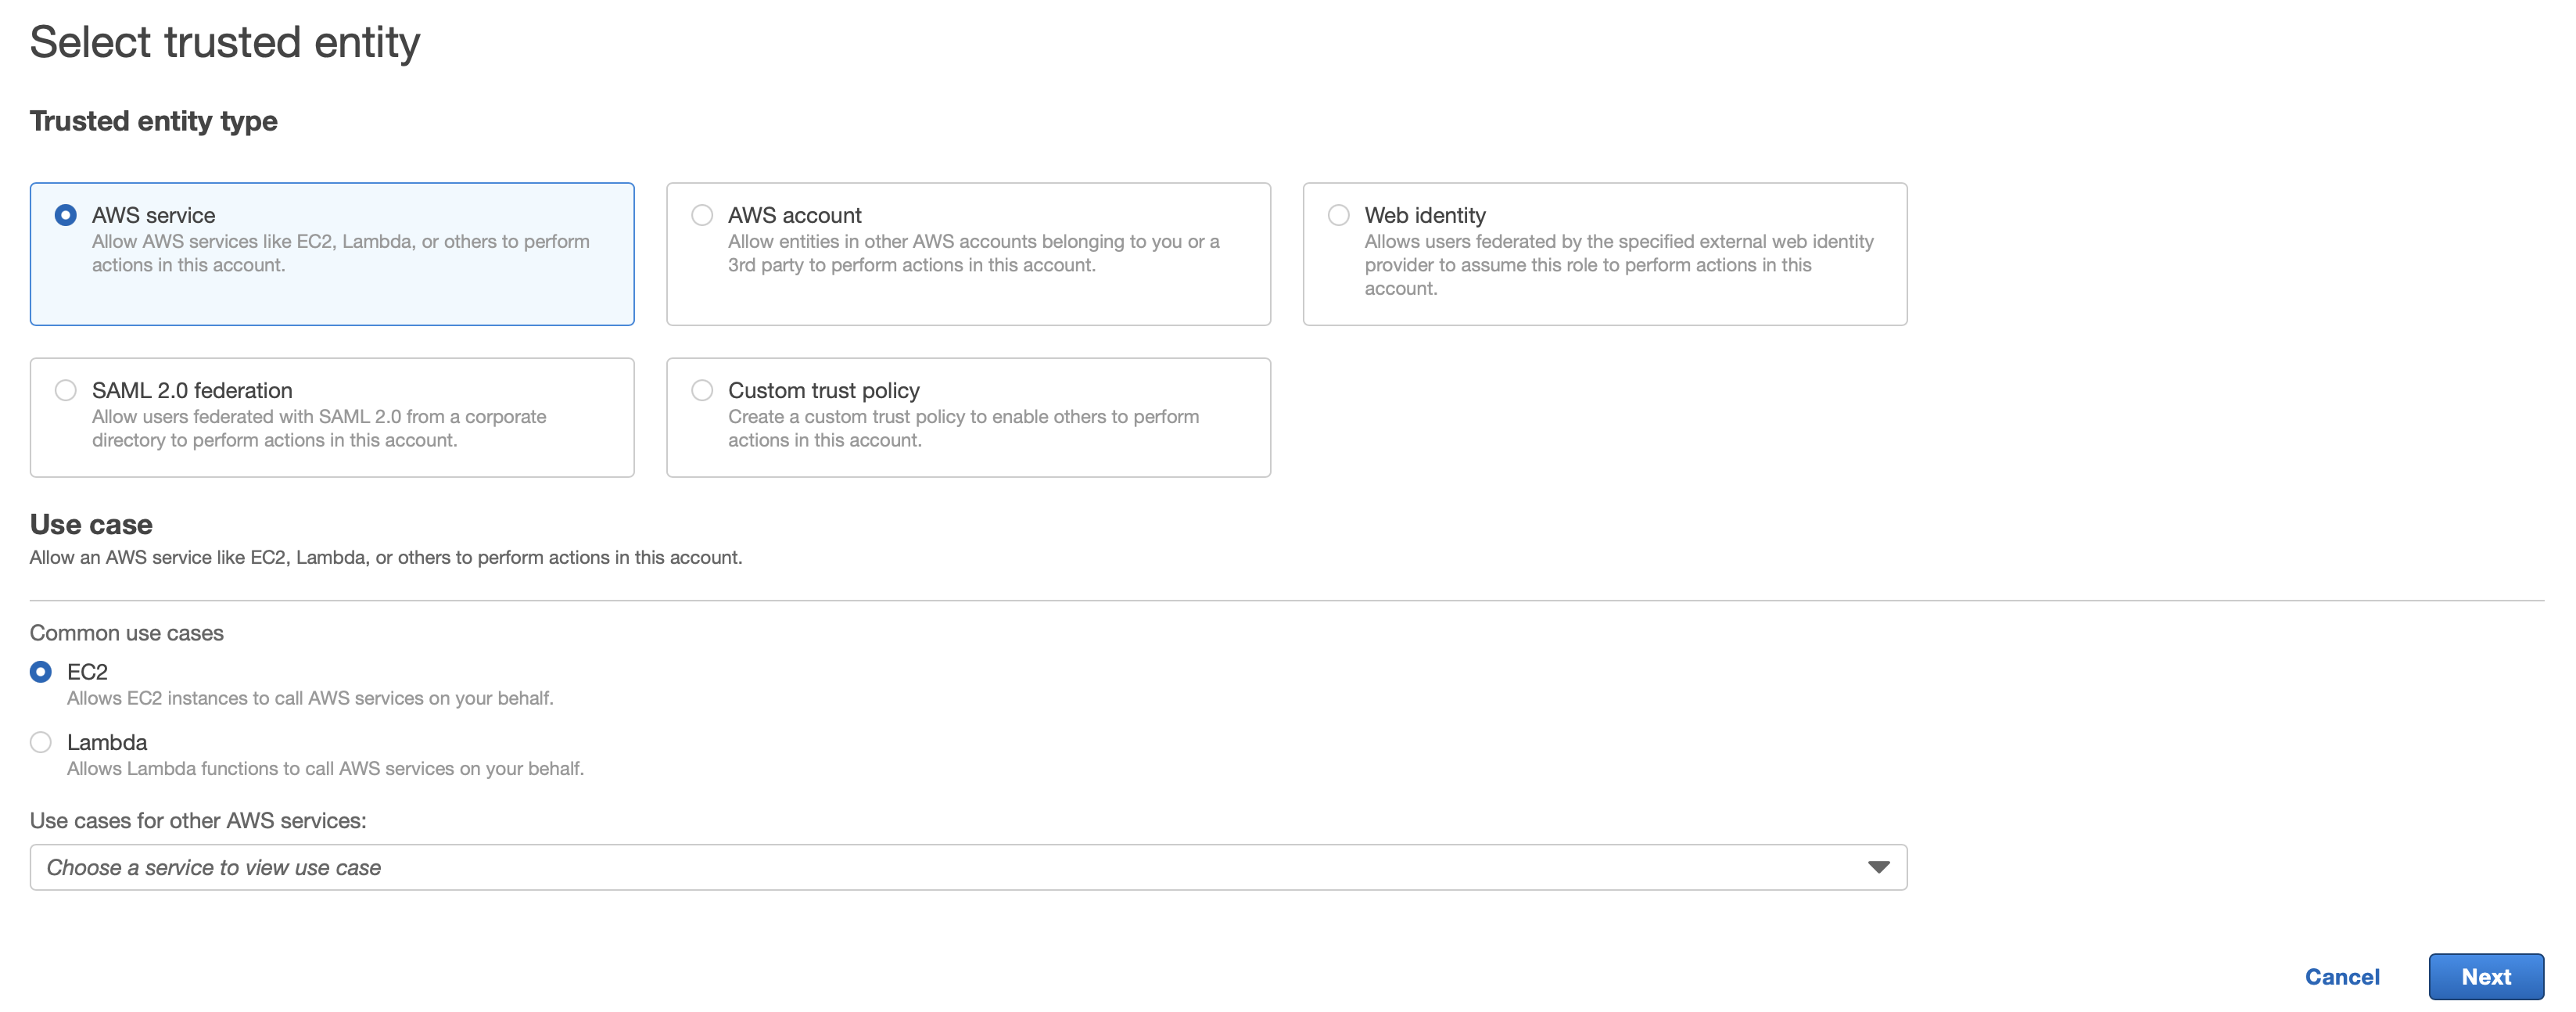
The trust policy relationship for the service-linked IAM role attached to the index needs to be extended with a trust entry for EC2. The trust policy of the service-linked role should be adjusted with following entries:
{
    "Version": "2012-10-17",
    "Statement": [
        {
            "Effect": "Allow",
            "Principal": {
                "Service": "kendra.amazonaws.com"
            },
            "Action": "sts:AssumeRole"
        },
        {
            "Effect": "Allow",
            "Principal": {
                "Service": "ec2.amazonaws.com"
            },
            "Action": "sts:AssumeRole"
        }
    ]
}
Attach Role to EC2 Instance
Attach the newly created IAM role to your instance under EC2 → Instances → <your-instance> → Security → Modify IAM role.

This will allow an application deployed in the instance to assume the role.
Enable Instance Profile in the Connector Configuration
Once the previously created role is attached to your EC2 instance, enable the option Basic → Amazon Kendra → Amazon Kendra Instance Settings → Use System Credentials.
If the option is enabled, the connector automatically retrieved the credentials from Amazon EC2 Metadata Instance Service.

If the connector is configured to index large files into a S3 bucket, enable also the option Advanced → Amazon Kendra → Content Processing Settings → Use System Credentials.
Assume Role with Security Token Service
The connector is able to fetch temporary security credentials from STS using the AssumeRole action.
The connector uses the fetched session-managed security token to authorize towards the AWS services accessed by the connector.
This feature can be used to access resources assigned to different roles or accounts.
Make sure to assign the permission policy STS:AssumeRole for the assuming role or account on the resource for the account to be assumed.
For the assumed account, make sure to define the trust policy with the principal of the role or the account assuming the role.
|
Apply the following configuration to use the AssumeRole feature with STS:
Basic Configuration → Amazon Kendra → Amazon Kendra Instance Settings

| Name | Property Key | Description |
|---|---|---|
Assume Role |
|
Enable this option to fetch the security token from STS using the provided role. |
Region |
|
Region ID for invoking the regional STS endpoint when requesting the service. |
Amazon Resource Name (ARN) |
|
ARN of the role which should be assumed by the configured role or account in the instance settings. |
Session Name |
|
Arbitrary session name attached to the session established by the connector and STS for tracking the session. |
Session Duration |
|
Time to live duration for a single session. |